Gel Stain Builder Cabinets

Recently, my in-laws purchased a large lot of land and gifted my husband and I with 8 acres to build on! Can you believe that? 8 acres! We are so excited to build our dream home, but in the mean time, we are working to clear the land (blog post soon on that). In addition, we have been slowly making improvements to our current home so it is ready to sell when it’s time to build.

If you have followed us recently you know I’m kind of a hot mess, so fixing up my house is terrifying! I decided my first project would be to update our master bathroom cabinets. I know what you are thinking… way to start small but I’ve disliked our cabinets since the day we bought this home. There were so many other things I loved about this house that I overlooked it. Not wanting to bank on someone else being willing to overlook the honey colored, builder cabinets, I decided it was time to give them a makeover. So, where does one go for ways to update cabinets that doesn’t involve a lot of knowledge? Pinterest of course! I searched through Pins and it didn’t take long to notice about 90% of them were using this gel stain. After reading a few blog posts about using the stain, I decided it seemed easy enough and I would give it a go.

These are my cabinets before.

IMG_1146.JPG

What you need: General Finishes Gel Stain in Java, General Finishes Gel Topcoat, foam brushes, sanding block

Step 1: Take all the doors and drawers off the vanity and lightly sand everything with a sanding block. I’ve read other bloggers who didn’t do this step and it didn’t affect the end result; however, I wanted to ensure I got the best results.

Step 2: Wipe the cabinets clean with water and let them dry for about an hour.

Step 3: Using a foam brush, apply a thin layer of the Java Gel stain on the cabinet doors and the vanity. Let dry for 24 hours.

IMG_1162.JPG

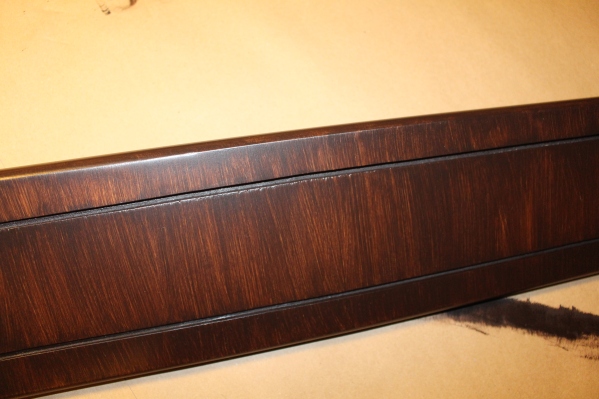
Step 4: Using the foam brush, apply addition coats (waiting 24 hours between each coat), until the desired color is reached. I did 3 thin coats to achieve a less painted look and let a little of the lighter wood show through. For a more consistent look, do additional coats.

2 coats
IMG_1161

3 coats

IMG_1157.JPG

Step 5: Using the foam brush, apply 3-4 coats of the Gel Topcoat (waiting 24 hours between coats).

Step 6: Put the doors and drawers back on the vanity. I added new oil rubbed bronze knobs to finish the look off.


IMG_1172.JPG

Overall, I’m very pleased with the result and it only cost me about $70.

Next, I plan to update the lighting fixtures, so stayed tuned for how that turns out.

-CeCe

Leave a comment and let me know if you have tried the Java Gel Stain or plan to try it.

Maximizing space 

So, we said we would take this blog in a new direction, so this is my first real attempt to do so!

About two years ago, my family moved into my grandparents house. We chose to do this for a few reasons, one being that it held a lot of sentimental value to me as I spent tons of time here growing up. We couldn’t bear the thought of a stranger living here, so we decided we would move in and eventually buy it from our family. Another reason we decided to make the move was because our house had just become too small. We had two toddlers, and the walls of our 1100 square foot home seemed to be closing in on us, we welcomed more room!

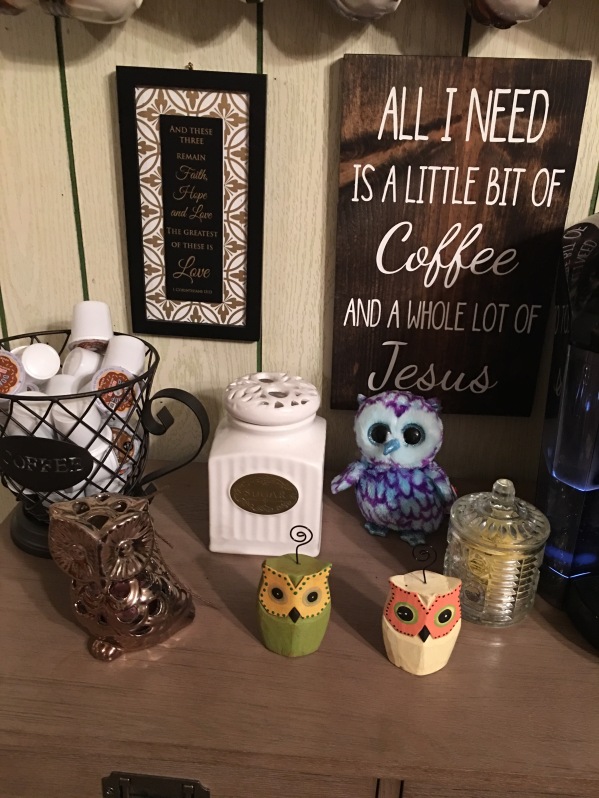
That being said, moving in here has presented opportunities and challenges from a space perspective. While we have physically more room, so areas we lost space in. Our old house, while small, had a pretty spacious kitchen with lots of counter and cabinet space. Our new kitchen is not quite as big, however, our new dining room is massive!!! So, in order to maximize counter space, I decided I wanted to add a coffee bar. The Keurig sitting on the counter along with the k-cups was just becoming annoying. After a lot of searching on Pinterest, I found a set up I liked and that I thought would work for our dining room. Next, I set out to find all of the corresponding pieces as well as the theme I wanted to introduce to our theme less kitchen/dining room.  I found a cabinet at Target and a shelf with baskets at Hobby Lobby and settled on an owl theme for my overall theme. With lots of cute owl additions and a few signs, it’s at a point that I’m happy with it. It’s definitely saved counter space, and it’s probably one of my favorite things in our house. Take a look at let me know your thoughts, but disregard the green paneled walls…that’s a project on our master project list…remember, it was my grandparents house!!


-Michelle

2 Mommies with Style are changing it up

Hi followers!! It’s Michelle!! Cece usually does most of the blogging due to her incredibly awesome fashion sense and her ability to navigate this blog a bit better than me! LOL! However, we were talking at lunch the other day and thought it might be fun to bring the blog back and change it up a bit.  We both love style and both go through periods where we have new clothes and can show off new outfits.  However, we also have other things both going on in our lives that has cut back on our clothing budgets!! Cece is looking to build a new house in the near future (we hope) and I am about to buy my grandfather’s house that we’ve lived in the past 2 years.  With that being said, we both are excited about house projects and designing and decorating our new homes.  We also have our crazy little boys, which always offer loads of entertainment, vacations, etc, etc.  So, we just thought we could expand the blog to other items such as those listed above.

We hope to get some of these things out to you all soon! Stay tuned for more exciting updates to come!!!